Digital Media 1 aka MMU
Sunday 24 July 2011
Advanced Layering
click the TM UNIVERSITY LOGO, then press Ctrl+A and Ctrl X .Second click "filter" then go " vanishing point" .
then Grab the point that I had selected.
press Ctrl+ V and adjust it properly and press ok.
Finally !
Sunday 17 July 2011
Retouching & Enhancing Digital
I would like to updated the lab 3 and 4 that i had learned . Due to some problem, I had change some image in this wallpaper, if compare with the previous wallpaper.
I had changed the MMU logo. Due to I still doing the adjustment so i haven't change the name of this image and temporary named as "layer 1" .
I press "alt+ move tool" to moved the "mascot" into the the wallpaper.
I use the "horizontal type tool" and double click the it to change the "layer style".
I added a notice board and a stick under the "mascot" For the stick image, I use " quick selection tool" to crop it
I added some text inside the notice board. which using "horizontal type tool"
To change the mascot's head colour, I use "rectangular marquee tool" to select the mascot's head part that I need it, then choose image -> adjustment -> replace colour.
To doing this part,Choose filter -> vanishing point -> create plane tool -> marquee tool to select the part I need it. After that press Alt + move the part that i had selected to cover the tree in the middle part.
To add some shadow colour at the mascot there, I click the mascot image and proceed to layer -> new layer -> brush tool and then overlay the layer and finnaly it completed.
Thursday 7 July 2011
Activities of Pulau Payar Marine Park
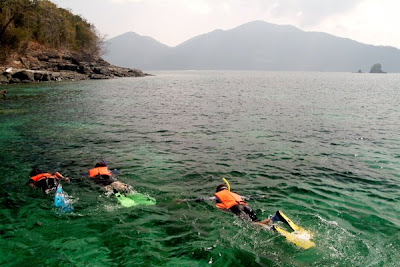
What is snorkelling? Snorkelling is the practice of swimming on or through a body of water while equipped with a diving mask, a shaped tube called a snorkel, and usually swim fins.
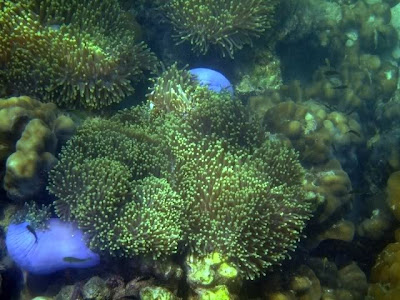
Pulau Payar Marine Park consists of four islands, Pulau Payar, Pulau Lembu, Pulau Kaca and Pulau Segantang. Pulau Payar Marine Park is located about 19 nm south of Pulau Langkawi, 32 nm north of Penang and 15 nm west of Kuala Kedah. Pulau Payar is a great place for novice divers and snorkelers. Pulau Payar offers four sandy beaches, which combine to provide a total length of about 200 meters. Teeming with coral reefs, the waters surrounding the four islands have an average visibility of between 9 to 15 meters by teeming with coral reefs. It makes the marine park an ideal place for snorkelling. Two tracking trails also available for visitors to explore the flora and fauna of the island. The island waters shelter a variety of fish and corals, enough to enrapture one's attention for hours on end. You'll revel in the company of colourful fishes as they go about their busy way. Various seashells, shellfishes and slugs that are scattered all over the seabed complete the wonderful underwater vista.
The dives reveal large groupers, fusiliers, groups of horse jacks, snappers, a variety of dacyllus, young black-tip sharks, spotter and brown moray eels, lionfish, black-spotted puffers, butterflyfish, angelfish, anemonefish, sea urchins, seastars, barrel sponges, sea cucumbers and lots more. These tracks appear to be underutilized as few visitors are even aware of their existence. Snorkel will enjoy the sight of colourful fishes darting playfully in and out of the corals.
Floating Reef Platform is designed for those who does not want to wet their bodies but still want to enjoy the marine life here. It is a platform called Coral Langkawi which is moored off Pulau Payar. Measuring 49 m by 15 m. It has a tunnel shape chamber at the bottom of the platform 10 feet below the sea. There are also boats which have glass bottom for you to see the marine life and corals as you move along the coral gardens. This platform is also equipped with a snack bar, a dining area and a sunbathing area.
Thursday 30 June 2011
Layering
After did the 1st step / 1st Lab which call Selection tools, now is time to proceed to 2nd steps/ 2nd Lab which call Layer Basics.
Step 1 : Use the "gradient tool"
Step 2 : Move the FOM pictures in and "select pixels, choose the layer and adjust the capacity" .
Step 3 : Use the "Quick selection tools" to crop the logo and then move it into the picture and "select pixels, choose the layer and adjust the capacity".
Step 4 : crop this by using "lasso tool" and move it into the picture.
Step 5 : Move the TM logo into the picture.
Step 6 :Add text inside the pictures by select "T" in Adobe Photoshop
FINALLY !!!
Selection
I had found 5 pictures from my personal camera and internet which from google.com to do my assignment 1 which call selection. I had combine all the 5 pictures into a A4 size paper.
Relevant Adobe Photoshop tools had use:
- Polygonal Lasso Tool
- Move Tool
The purpose we choose this 5 pictures is to create a poster which named as FOM Open Day 2012. So, here are the 1step before we proceed further. Enjoy=)
Wednesday 22 June 2011
Pratice
I had been learned some skills of PhotoShop CS4 during my 1st tutorial class, I'm creating a simply picture by using 3 simple steps which are Lasso Tool, Quick Selection Tool and crop tool. Due to some problem, I cant use CS4 for my laptop, so I decide to use CS5 to practice it.
Step 1 - Use crop tool and lasso tool to crop & cut it.
Step 2 - Use the rectangular Lasso Tool to crop & cut it.
Step 3- Finally it become a new simply picture.
Due to I'm a new beginner using the Adobe Photoshop, so there will be many tools I still dunno how to use it. Will practice more :)
Monday 20 June 2011
Introduction
My Name is Siew Mun Kin from BBA (Hons) Management with Multimedia
My Student ID is 1101109653
I'm from Serdang which nearby from Cyberjaya.
I"m taking this subject MMB 2014 Digital Media 1 this trimester and from tutorial group BC271 B .
The purpose I create this blog is because the subject -MMB 2014 Digital Media 1 need it. Beside that, it also can improve my writing skill. Anyway, I hope everyone have a nice day. ENJOY :)
I"m taking this subject MMB 2014 Digital Media 1 this trimester and from tutorial group BC271 B .
The purpose I create this blog is because the subject -MMB 2014 Digital Media 1 need it. Beside that, it also can improve my writing skill. Anyway, I hope everyone have a nice day. ENJOY :)
Subscribe to:
Posts (Atom)


